WATCH THIS! Filmed at bb7.
Thanks Rob
 |
We have our first major custom part machined!
Here is the motor adapter plate. It connects the electric motor to the Studebaker transmission. Jon did all the calculations, and fitting to design the plate. The tricky part is to make the motor and transmission shafts line up perfectly and just 1/4" between them.
 |
| Motor Adapter Plate - 2" thick aluminuminum |
And here is the part that Larry made. Click to zoom, it's a beautiful picture taken by Bryon.
There are some other pieces that Mark made to attach the flywheel to the motor. Then Jon took that assembly to a specialty shop to be balanced. It wouldn't do to have this thing vibrate apart.
The whole thing when together perfectly. I'll have a picture next time.
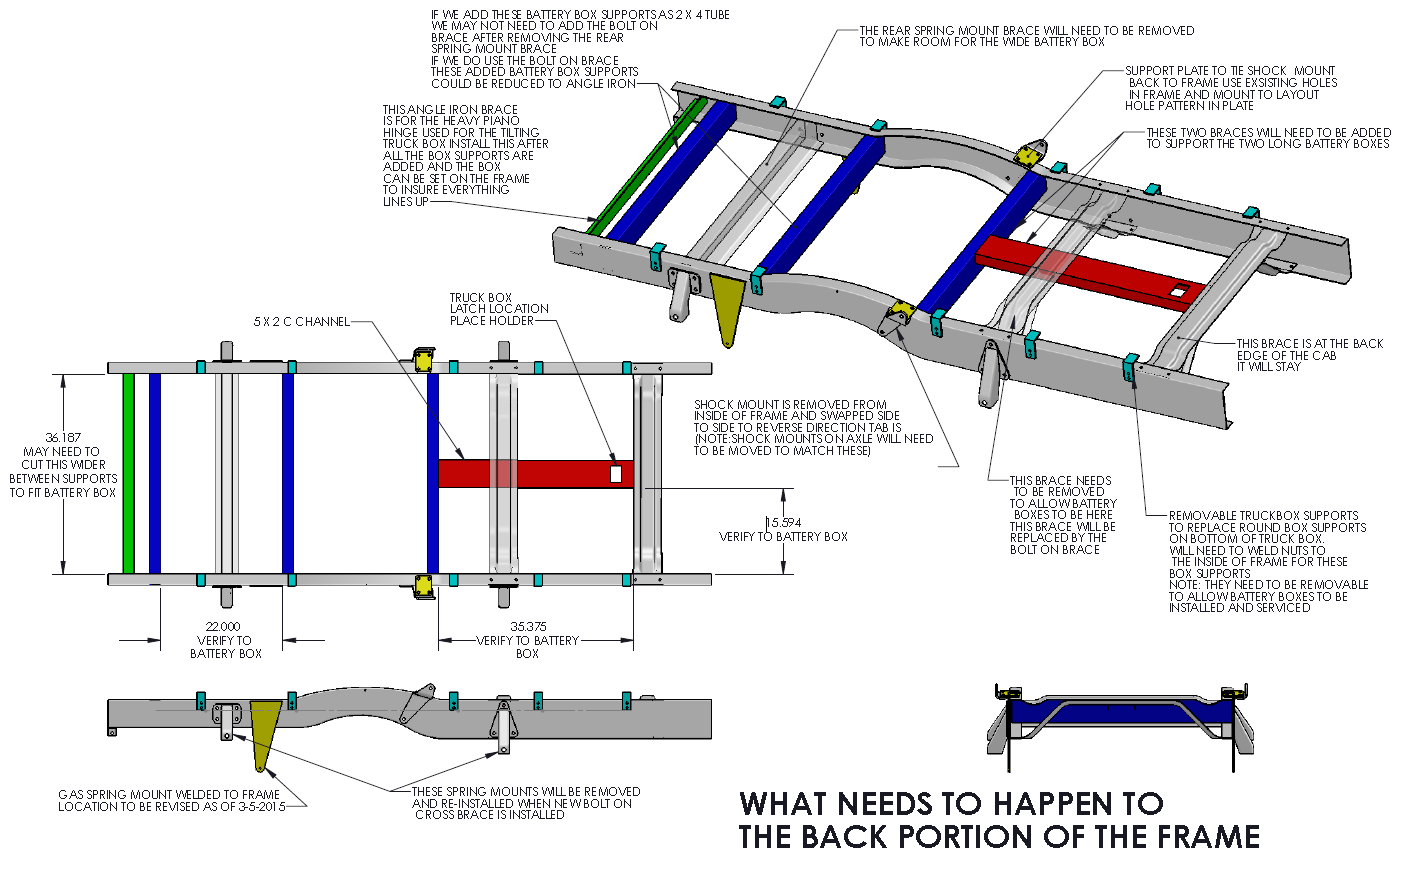
Greg has done a great job modeling up various ideas. The drawings below sum up where we are. The process will involve removing some key frame members and replacing them with new assemblies (so the wheels won't fall off).


Ben and Dave started lowering the front end on Friday. They will take the leaf spring that sits on top of the front axle and put it under the front axle. It's a pretty easy process except for the fact that the bolts have been tightly in place for 55 years. Dave was really working up a sweat.
Finally, Duane and I dropped the assembled motor/transmission into the truck. That was great fun to see how small the motor is. Here's a picture.

Finally, Duane and I dropped the assembled motor/transmission into the truck. That was great fun to see how small the motor is. Here's a picture.
No comments:
Post a Comment
Note: Only a member of this blog may post a comment.